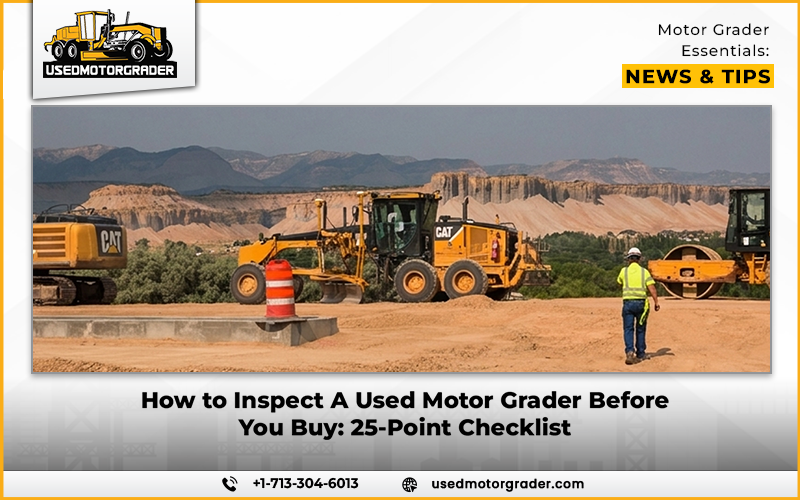
A grader that looks spotless in photographs can still hide a loose circle, a worn articulation joint, or a tired hydraulic pump. A proper used motor grader inspection checklist therefore goes well beyond paint and the hour meter. If you are wondering what to check when buying a used grader, the short answer is this: confirm the machine’s identity and service history, inspect the engine, drivetrain, hydraulics, frame, articulation, circle, moldboard, tires and controls, then finish with a controlled operating test. The 25 points below follow that order.
If it’s your first purchase, read about the common mistakes first-time grader buyers should avoid before you travel to see a machine.
How to Prepare for a Motor Grader Pre-Purchase Inspection
Ask the seller beforehand for the serial number, service records, fluid reports, and telematics data, and get the operator’s manual for the exact model: a recommendation for a Cat 140H does not automatically apply to a Cat 140M, a John Deere 772G, or a Komatsu GD655. Documentation is available through channels such as Deere’s manuals and training page and Caterpillar’s service manuals page. Observe these safety rules:
- Chock the wheels, lower the blade, and shut the engine down before looking underneath or near moving parts.
- Never stand or reach under a raised moldboard that is not mechanically supported.
- Never open a hot or pressurized cooling system, or touch a suspected high-pressure hydraulic leak.
Section A: Identification, History and Initial Inspection (Points 1–4)
1. Verify the serial number, model, and configuration
What to inspect: Compare the identification plate and stamped serial number with the listing, bill of sale, service records, and manufacturer information. Confirm model, year, drivetrain (two-wheel or all-wheel drive), and options such as scarifier, ripper, or grade control.
Warning signs: Mismatched numbers, a plate that looks replaced, or specifications that differ from the advertisement.
Why it matters: A bad number can signal theft or a lien. In the United States, most heavy equipment has no title, so buyers commonly run a UCC lien search and may check registries such as the National Equipment Register. Neither is foolproof, since lien searches can miss records. Other countries use different systems, so ask a local adviser.
2. Cross-check the hour meter and operating history
What to inspect: Compare displayed hours with service invoices, electronic records, and telematics, such as Cat’s Product Link, which tracks hours and diagnostic codes.
Warning signs: A meter that disagrees with paperwork, a replaced meter, or wear that does not fit the stated hours. Unusually low hours deserve verification, not automatic trust.
Why it matters: Even Ritchie Bros. lot listings state that no guarantee is made about actual hours. No hour count is universally too high.
3. Review motor grader maintenance records and major repair history
What to inspect: Dated invoices for scheduled service, fluid changes, engine, transmission, hydraulic pump, circle or drawbar work, and past faults. Cat points owners to the operation and maintenance manual’s intervals.
Warning signs: “Fully serviced” with nothing on paper, long gaps, or repeated repairs to one system.
Why it matters: Deferred servicing returns as repair bills. If records are thin, ask for dealer history, component-replacement invoices, and fluid reports.
4. Conduct a cold, ground-level walkaround
What to inspect: Before starting, look at the ground for fresh drips, then check panels, guards, bolts, corrosion, frame lines, and paint.
Warning signs: A freshly cleaned engine bay or new paint may be routine detailing or may cover leaks and repairs. Neither proves deception, so ask. Photograph anything suspicious and recheck after the machine runs.
Why it matters: Cold-state leaks and repairs become your baseline for the warm recheck in point 25.
Section B: Engine, Fluids, Cooling and Drivetrain (Points 5–11)
5. Observe the cold start and initial running behavior
What to inspect: Confirm the engine is genuinely cold, then watch starting effort, idle, vibration, knocks, warning lamps, and exhaust.
Warning signs: Hard starting, rough idle, new noises or persistent smoke. Smoke color and duration depend on temperature, load, engine design, and emissions equipment, so one symptom calls for tests, not a diagnosis.
Why it matters: A cold start can expose problems a warm engine hides.
6. Inspect engine oil, crankcase condition and visible leaks
What to inspect: With the engine off, check oil level and appearance, then look at gasket joints, oil pan, pumps, fuel lines, and exhaust manifold. Equipment World’s used-grader inspection guide notes milky oil can mean water in the crankcase.
Warning signs: Milky or discolored oil, low or overfull levels, active seepage.
Why it matters: Appearance is not a diagnosis; oil analysis and proper instruments add evidence.
7. Examine the radiator and cooling system
What to inspect: On a cold machine, check fins, mounts, tanks, hoses, and clamps.
Warning signs: Packed debris, bent fins, chalky seam deposits (which the same guide links to past coolant leaks), or oil in coolant or coolant in oil, which may mean cross-contamination needing testing.
Why it matters: Long shifts under load in dust strain cooling. Check the model’s manual for specifications.
8. Inspect the air intake, fuel system, turbocharger, exhaust, and emissions equipment
What to inspect: Check intake hoses, fuel lines, turbo connections, and exhaust joints for cracks, leaks, soot, and improvised repairs.
Warning signs: Active aftertreatment warnings, unexplained deposits, or undocumented repairs.
Why it matters: Equipment varies. Cat’s Tier 4 Final M Series 3 graders use selective catalytic reduction with diesel exhaust fluid, while Deere’s Tier 4 Final G-Series uses a diesel particulate filter with automatic cleaning. Older machines may have neither, and repair implications differ.
9. Test the transmission and torque converter
What to inspect: In a safe open area and following the operating instructions, engage forward and reverse in every available gear.
Warning signs: Delayed engagement, slipping, harsh shifts, whining, vibration, warning lamps, or odd behavior as temperature rises.
Why it matters: A short yard drive proves little; Ritchie Bros. listings note equipment is not operated in all available gears or tested under load. Shift specifications are model-specific.
10. Examine the differential, final drives and tandem-drive assemblies
What to inspect: Tandems are the pivoting rear-wheel assemblies on each side; on many graders they are oil-filled housings carrying final-drive components. Check for cracks, seal seepage, heat, and noise.
Warning signs: Leaks, damaged housings, grinding, excess heat, or concerning fluid results.
Why it matters: Internal arrangements differ by make. A technician can check fluid condition and wear metal; Cat’s fluid-analysis resources include drive-train sampling guidance.
11. Test the service brakes and parking brake
What to inspect: Under the manufacturer’s recommended conditions, check warning indicators, pedal response, stopping, and parking-brake holding.
Warning signs: Weak or inconsistent response, noise, leaks near brake components, or undocumented repairs.
Why it matters: Braking defects are safety-critical, not cosmetic. Never improvise tests or use public roads without authorization.
Section C: Tires, Structure, Steering and Articulation (Points 12–15)
12. Inspect tires, rims, wheel components and tire matching
What to inspect: Check tread, sidewall cuts, bulges, cracking, repairs, rim damage, and inflation. Compare all tires for size, type, and age.
Warning signs: Uneven wear can reflect application, alignment, loading, or maintenance, so investigate. ForConstructionPros quotes manufacturers saying unequal pressures change blade height.
Why it matters: There is no universal tread limit; get a current dealer quote for the exact size.
13. Inspect the main frame and look for structural repairs
What to inspect: Examine accessible sections for cracks, deformation, corrosion, and questionable welds, especially near the articulation joint, front end, and drawbar mount.
Warning signs: Fishplates, which are reinforcing plates over repaired cracks. Ritchie Bros. and Cat Used say they are not automatically bad, but an experienced welder should have done the work.
Why it matters: A documented professional repair differs from an undocumented patch, but visual inspection cannot verify integrity. Get specialist evaluation for cracks or poor welds.
14. Check the articulation joint, pins, and bushings
What to inspect: The articulation joint is the pivot between front and rear frames, allowing steering and tight turns. Check grease evidence, pins, bushings, cylinder seals, and visible movement.
Warning signs: Play, repair welds, or sections that do not line up. Cat Used notes that an engine compartment sitting lower than the cab can indicate a bent joint.
Why it matters: Excess play affects steering, stability, and blade positioning. A technician can compare movement with the model’s published clearances, separating normal wear from movement beyond limits.
15. Inspect the front axle, steering linkage and wheel lean
What to inspect: Wheel lean tilts the front wheels to resist side thrust. Inspect pins, bushings, tie rods, the lean mechanism, and axle for play, bending, and binding.
Warning signs: Wander, binding, uneven front-tire wear, or damage inside the frame. Ritchie Bros. says strain from turning and leaning shows on the inside of the frame and front axle. No single pattern proves a cause.
Why it matters: Run a controlled steering test and seek specialist assessment if movement looks abnormal.
Section D: Hydraulics and the Blade Assembly (Points 16–23)
16. Inspect the hydraulic reservoir, pump, hoses, lines and connections
What to inspect: Start with the ground, as Cat Used advises, then check cylinders, lines and hoses in the engine compartment and circle-drive housing, plus fluid level and condition.
Warning signs: Weeping fittings, chafed or bulging hoses, mismatched repair hoses, dirty fluid.
Why it matters: A clean exterior does not prove a healthy pump. Never touch suspected high-pressure leaks or open circuits without the correct procedure.
17. Test hydraulic cylinders, seals, response, and ability to hold position
What to inspect: Examine blade-lift, sideshift, tilt, and other cylinder rods for scoring and wet seals, then operate each function.
Warning signs: Jerky motion, noise, drift, or lift-cylinder movement that does not immediately move the cutting edge. A Caterpillar representative quoted by ForConstructionPros says delayed movement with the moldboard raised indicates loose linkage.
Why it matters: Drift has several causes, so separating external leaks from internal leakage may require pressure or leak-down testing.
18. Inspect the circle, circle-drive mechanism, gears, and pinion
What to inspect: The circle is the toothed ring beneath the frame that rotates the moldboard, driven by a pinion. Check the surface, teeth, pinion, drive seals, and any cracks or welds, then rotate it through its full range.
Warning signs: Uneven tooth wear, binding, jumping, noise, or backlash. A John Deere representative told ForConstructionPros that wear adds play that shifts cutting-edge height in ways neither operator nor grade control can detect.
Why it matters: Motor grader circle wear affects blade positioning and finish accuracy. Judging it against manufacturer tolerances needs measurement by a qualified mechanic.
19. Examine circle support shoes and wear strips, shims, and adjustment points
What to inspect: These parts hold the circle in place while letting it turn. Check for gaps, uneven wear, loose hardware, and signs of recent shimming.
Warning signs: Visible clearance or movement during approved operation. Ritchie Bros. advises running a shimmed circle through full rotation to check for play, and Caterpillar’s representative describes front-to-back blade chatter as a sign adjustment is due.
Why it matters: Excess clearance undermines finish grading. There is no universal acceptable gap or shim count; consult model specifications.
20. Inspect the drawbar, A-frame, ball stud, wear inserts, and linkage
What to inspect: The drawbar connects the circle to the front frame through a ball stud. Check for cracks, repair welds, loose bolts, ball-and-socket wear, and gaps between wear inserts and the drawbar plate, visible with the moldboard raised.
Warning signs: Movement during function tests, damaged mounts, or fresh weld work.
Why it matters: Wear affects blade stability and finish quality. Clearance limits are model-specific, so ask a mechanic.
21. Assess the moldboard, cutting edges, end bits, and wear patterns
What to inspect: Check remaining edge material, cupping, end bits, missing hardware, enlarged mounting holes, wear into the moldboard’s base metal, warping, and impact damage.
Warning signs: Wear that does not match the claimed application or hours. Edges are replaceable consumables; moldboard damage is different, and Cat Used and Ritchie Bros. both note an edge costs less to replace than a moldboard.
Why it matters: Wear patterns are clues, not proof of neglect. Deere’s representative told ForConstructionPros that highway work tends to wear the center while subdivision work wears the ends. Read about what uneven moldboard wear can reveal about a grader’s working history.
22. Test the moldboard’s range of movement and ability to hold position
What to inspect: Operate lift on both sides, sideshift, tilt, pitch, circle rotation, and any other positioning function.
Warning signs: Jerky or delayed response, play, noise, drift, or movement that does not match control input.
Why it matters: Where authorized and safe, a representative grading pass reveals what a stationary test cannot, though no test predicts every surface or load. Never place yourself under an unsupported raised blade.
23. Inspect scarifiers, rippers, front blades and other attachments
What to inspect: Confirm each attachment is present, mounted, hydraulically connected, working, and included in the sale. Check teeth, pins, mounts, and hoses.
Warning signs: Missing parts, cracked mounts, loose pins, or advertised equipment not on the machine.
Why it matters: Present is not the same as operational or suitable for your work. Verify capabilities against the actual configuration.
Section E: Operator Station, Technology and Final Operating Test (Points 24–25)
24. Examine the cab, safety equipment, electrical systems, displays and grade-control technology
What to inspect: Check seat belt, steps, visibility, controls, gauges, lights, alarms, battery connections and wiring, and read stored fault codes. Inspect the rollover protective structure (ROPS) for cracks, modifications, and missing labels. OSHA’s ROPS standard applies to all motor graders used in construction work in the USA.
Warning signs: Damaged safety equipment, chafed harnesses, active faults.
Why it matters: Fitted grade-control hardware does not prove the system is calibrated, complete, or compatible with your workflow. Ask the OEM or system provider before assuming an older grader accepts an upgrade.
25. Carry out a controlled operating test and warm-machine recheck
What to inspect: Agree the plan with the seller, follow the manual and site rules, and test travel, steering, braking, shifting, hydraulics, blade positioning, and attachments. Afterward, recheck for new leaks, warnings, or noises that appeared as the machine warmed.
Warning signs: A seller who refuses reasonable testing, a machine that cannot be operated safely, or problems that emerge under load.
Why it matters: Pause the purchase if any occur and get diagnostic work done. Hire a qualified independent inspector when value, complexity, or uncertain history justifies it.
How to Interpret Your Inspection Findings
This table is a decision framework, not a diagnostic standard; seriousness depends on the machine, its application, manufacturer limits, and further testing.
| Finding category | Examples | Recommended response |
| Routine wear or maintenance | Worn cutting edges, ordinary tire wear, scheduled service needs | Estimate verified replacement costs and include them in the ownership budget |
| Significant concern requiring further evaluation | Hydraulic drift, unusual circle play, unexplained fluid contamination, questionable repair work | Obtain a specialist diagnosis and revise the offer only after the likely repair scope is established |
| Potential deal-breaker | Serious structural damage, unsafe steering or braking, major drivetrain symptoms, inconsistent ownership information | Pause the purchase until the issue is independently resolved or decline the machine |
One worn consumable should not disqualify a machine, and clean paint should not outweigh evidence of mechanical trouble. This article assigns no dollar figures, because credible costs depend on model, region, currency, and date; get written quotes for the exact machine.
What Photos, Reports and Seller Assessments Cannot Tell You?
Evidence comes in levels: a visual walkaround, the seller’s assessment, a report on visible components, a controlled operating test, an independent mechanical inspection, and laboratory testing. Scope matters. Ritchie Bros. say their equipment information is limited in scope and equipment is not tested under load. Ask for a fresh, machine-specific report and what was tested.
Remote or international buyers should request a dated photo set, a cold-start video, an operating video, serial-number verification, records, and a local independent inspection. Video supports an in-person examination but does not replace it.
Fluid analysis. Laboratory testing of engine oil, transmission oil, hydraulic fluid, coolant, and drive-train oil can reveal wear metals, contamination, and degraded fluid. Cat’s S·O·S program stresses clean sampling and trend analysis. One sample is a snapshot, not a forecast of remaining life; combine it with records and inspection.
Making the Final Buying Decision
Before committing:
- Organize photos, records, and notes; separate routine replacement from serious unresolved defects, and request documents for discrepancies.
- Get a professional diagnosis for expensive or safety-critical concerns, and consider fluid testing when value and symptoms justify it.
- Compare machines of similar model, configuration, age, and documented condition.
- Add transport, immediate maintenance, and verified repair costs to the price.
Negotiate when the repair scope is clear, postpone while a significant concern awaits diagnosis, and walk away when ownership is inconsistent, safety is compromised, or the seller blocks reasonable testing. The lowest price is not the lowest ownership cost. Weigh resale prospects and local support too.
When you are ready to shop,browse used motor graders from leading brands on UsedMotorGrader.com, with listings from Caterpillar, John Deere, Volvo, and Komatsu. Review each listing’s specifications, hours, and condition information, then apply this used grader buying checklist.
FAQs
1. What is the most important thing to inspect on a used motor grader?
A: Overall mechanical condition: how the engine, drivetrain, frame, articulation, circle, drawbar, and moldboard work together. Your intended use decides which findings matter most.
2. How many hours are too many for a used motor grader?
A: There is no universal cutoff. Maintenance records, application, corroborated hours, major component condition, and inspection results say more than the meter alone.
3. Should I get an independent inspection before buying a used grader?
A: Yes, when the machine is expensive, complex, or poorly documented, or when you cannot attend. Add laboratory fluid analysis if the history is uncertain or symptoms appear.
4. Can I buy a used motor grader based on photographs and an inspection report?
A: Photos and reports are useful preliminary evidence but may not reveal hidden mechanical condition or performance under load. Where feasible, arrange an operating test and an independent inspection.